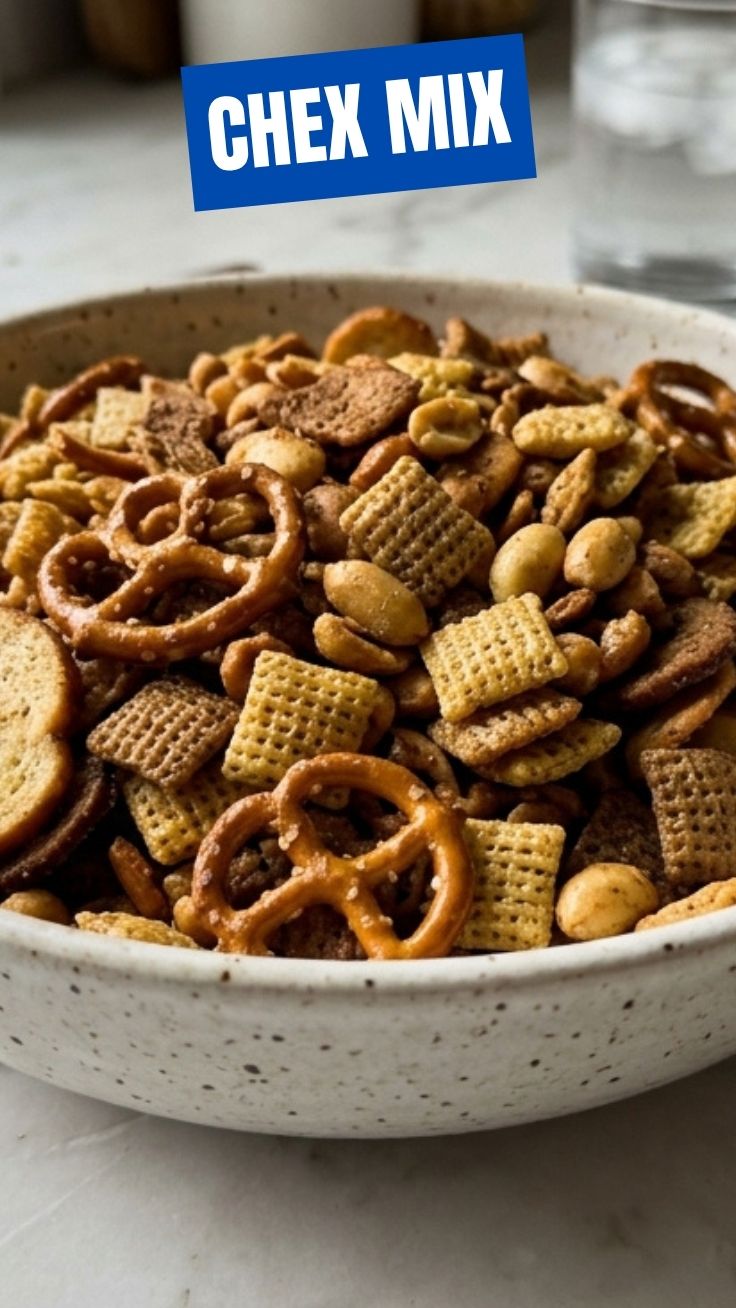
Unlock Unbeatable Crunch: Your Guide to Homemade Chex Mix Perfection
Ever wondered how to create that irresistible, seasoned crunch that keeps everyone coming back for more? While store-bought options are convenient, crafting your own Chex Mix at home offers an unparalleled level of customization, fresh flavor, and the sheer satisfaction of a perfectly tailored snack mix. This comprehensive guide will not only walk you through the process of making the ultimate crunchy Chex Mix but also empower you with tips and tricks to elevate your snack game. Prepare to transform simple ingredients into a truly addictive treat that will be the star of your next gathering or quiet night in.
Ingredients & Kitchen Tools
Crafting the perfect batch requires a thoughtful selection of components and the right equipment.
Chex Cereals (3-4 cups total): A mix of Corn Chex, Rice Chex, and Wheat Chex provides diverse textures. Pro-tip: Don’t be afraid to experiment with other square-shaped cereals for added variety.*
Pretzels (1 cup): Small twists or sticks work best for even coating. Adds a delightful salty counterpoint.*
Nuts (1 cup): Mixed nuts, pecans, or cashews are excellent choices. For extra flavor, use roasted nuts.*
Bagel Chips or Rye Crisps (1 cup, broken into pieces): Contributes an extra layer of savory crunch. Ensures every bite is uniquely satisfying.*
Unsalted Butter (1/2 cup, melted): The base for our flavor binding. Unsalted allows for better control of the final seasoning.*
Worcestershire Sauce (2 tablespoons): A secret weapon for deep umami flavor. Adds complexity and a savory punch.*
Garlic Powder (1 teaspoon): Classic aromatic backbone. Pairs wonderfully with most savory flavors.*
Onion Powder (1 teaspoon): Another essential savory enhancer. Complements the garlic without overpowering it.*
Smoked Paprika (1 teaspoon): For a subtle smoky depth. Adds warmth and a touch of color.*
Cayenne Pepper (1/4 teaspoon, optional): For a gentle kick. Adjust to your preferred spice level.*
- Salt (1/2 teaspoon, or to taste): Balances and enhances all flavors.
- Large Roasting Pan: Essential for even baking and easy tossing.
- Large Mixing Bowl: For combining dry ingredients and coating.
- Whisk: For thoroughly mixing the butter and seasonings.
- Spatula or Wooden Spoon: For tossing the Chex Mix during baking.
Prep Time & Cooking Schedule
- Prep Time: 15 minutes
- Cook Time: 60 minutes
- Resting Time: 15-30 minutes (for cooling and crisping)
This recipe is ideal for a weekend afternoon when you have an hour to dedicate to slow baking and stirring. The longer cooking time at a lower temperature is crucial for achieving that signature dry, even crispness and ensuring all components are thoroughly seasoned and toasted.
Step-by-Step Instructions
Follow these clear steps to create your own perfectly seasoned and crunchy Chex Mix.
1. Preheat & Prepare: Preheat your oven to a low 250°F (120°C). In a large roasting pan, combine your chosen Chex cereals, pretzels, nuts, and bagel chips. Stir gently to distribute the ingredients evenly. This forms the wholesome base of your delightful snack mix.
2. Craft the Flavor Sauce: In a separate medium bowl, whisk together the melted unsalted butter, Worcestershire sauce, garlic powder, onion powder, smoked paprika, cayenne pepper (if using), and salt until well combined and fragrant.
3. Coat Evenly: Pour the seasoned butter mixture over the dry ingredients in the roasting pan. Using a spatula or wooden spoon, gently toss the ingredients until everything is as evenly coated as possible. Take your time here; thorough coating is key to consistent flavor.
4. Bake to Perfection: Place the roasting pan in the preheated oven. Bake for 1 hour, stirring every 15 minutes. This regular stirring is vital; it prevents burning, promotes even toasting, and helps achieve that beloved crisp texture. Keep a close eye on the edges, ensuring nothing gets overly dark.
5. Cool & Enjoy: Once baked, remove the pan from the oven and spread the Chex Mix onto a large sheet of parchment paper or a cooling rack to cool completely. As it cools, it will become even crispier.
Nutritional Benefits & Advantages
Homemade Chex Mix, while a treat, can offer some surprising benefits. Cereals provide whole grains and fiber, contributing to digestive health. Nuts add healthy fats, protein, and essential minerals like magnesium and zinc. By controlling the ingredients, you can reduce sodium content compared to commercial versions and avoid artificial flavors or preservatives. It’s a satisfying snack mix that can be adjusted to fit various dietary needs.
Tips Variations & Cooking Advice
- Spice It Up: Add a dash of chili powder, a pinch of red pepper flakes, or a tablespoon of your favorite hot sauce to the butter mixture for a fiery kick.
- Sweet & Savory: Explore a touch of maple syrup or brown sugar in your butter mixture alongside the savory seasonings for a delightful contrast.
- Herbaceous Notes: Incorporate dried rosemary, thyme, or Italian seasoning for an aromatic twist.
- Nut-Free Option: Substitute nuts with pumpkin seeds, sunflower seeds, or more pretzels/bagel chips for allergy-friendly versions.
- Gluten-Free: Ensure all your chosen cereals, pretzels, and add-ins are certified gluten-free. Rice Chex and Corn Chex are typically gluten-free, but always check labels.
Common Mistakes to Avoid
- Overcrowding the Pan: Too many ingredients in one pan leads to steaming rather than toasting, resulting in a soggy mix. Use two pans if necessary.
- Not Stirring Enough: This is the most common mistake! Skipping stirs leads to uneven cooking and burnt spots. Stick to the 15-minute stirring schedule.
- Baking at Too High a Temperature: A higher temperature can burn the outside before the inside crisps, resulting in an unpleasant texture. Low and slow is the key.
- Skipping the Cooling Step: The mix crisps up significantly as it cools. Don’t rush it into a container.
Storage & Meal Prep Tips
Store your homemade Chex Mix in an airtight container at room temperature for up to 2 weeks. For optimal freshness and crunch, a glass jar or a sturdy plastic container with a tight-fitting lid works best. It doesn’t require refrigeration. This snack mix is an excellent make-ahead option for parties, road trips, or simply having a satisfying snack on hand throughout the week.
Conclusion
Mastering the art of homemade Chex Mix is a rewarding culinary journey that combines simplicity with incredible flavor. By following these detailed steps and embracing the power of customization, you’ll be able to create a perfectly seasoned, irresistibly crunchy snack mix that outshines any store-bought alternative. Don’t hesitate—give this recipe a try and share your delicious results with us! What’s your favorite secret ingredient?
FAQs
Q1: Can I make this in an air fryer?
A1: While possible, an air fryer might not provide the same even toasting for a large batch. If you attempt it, work in very small batches, reduce the temperature significantly (e.g., 200°F), and stir even more frequently to prevent burning.
Q2: My Chex Mix isn’t as crispy as I’d like. What went wrong?
A2: This usually indicates either too high a baking temperature (which burns the outside before it dries), not enough stirring during baking, or not allowing it to cool completely before storing. Ensure consistent low heat and frequent agitation.
Q3: Can I double this recipe?
A3: Yes, you can double the recipe. However, you will likely need two large roasting pans to avoid overcrowding and ensure proper air circulation for even crisping.
Q4: How can I adjust the saltiness?
A4: Start with half the recommended salt and taste after the first 30 minutes of baking. You can add more salt towards the end of the baking process or as it cools if needed. Remember, Worcestershire sauce also contributes to saltiness.
Q5: What are some alternative spices for a different flavor profile?
A5: For a Tex-Mex twist, use chili powder, cumin, and a dash of lime juice. For an Italian flair, try dried oregano, basil, and a sprinkle of Parmesan cheese (add after baking). The possibilities are endless!