Beyond the Box: Crafting Perfect Homemade Rice Krispie Treats Every Time
Ever wondered if those delightful, gooey Rice Krispie Treats could taste even better than the ones you remember from childhood? The answer, my friends, is a resounding yes! While store-bought versions offer convenience, there’s an undeniable magic in creating these classic confections at home. Not only do you get to control the quality of your ingredients, from the butter to the marshmallows, but you also unlock a world of customization, ensuring each bite is a symphony of crispiness and chewiness. Get ready to elevate your dessert game and discover the simple joy of making the ultimate batch of these beloved treats, starting with the foundational rice krispie cereal.
Ingredients & Kitchen Tools
- Unsalted Butter (4 tablespoons): Essential for flavor and preventing sticking. Using unsalted allows you to control the salinity.
- Mini Marshmallows (10 ounces, about 40 large marshmallows): The star of the show, providing the signature chewy texture and sweetness. Mini marshmallows melt more evenly.
- Rice Krispie Cereal (6 cups): The eponymous crunchy base. Ensure it’s fresh for optimal crispiness.
- Vanilla Extract (1 teaspoon, optional): Enhances the overall flavor profile. Use pure vanilla for best results.
- Salt (Pinch, optional): Balances the sweetness and brings out other flavors.
- 9×13 Inch Baking Dish: For shaping and cooling your treats.
- Large Non-Stick Pot: To melt the butter and marshmallows. A non-stick surface makes cleanup a breeze.
- Rubber Spatula or Wooden Spoon: For stirring and mixing.
- Parchment Paper or Wax Paper: To line the baking dish for easy removal and prevent sticking.
- Cooking Spray or Extra Butter: For greasing the spatula and dish.
Prep Time & Cooking Schedule
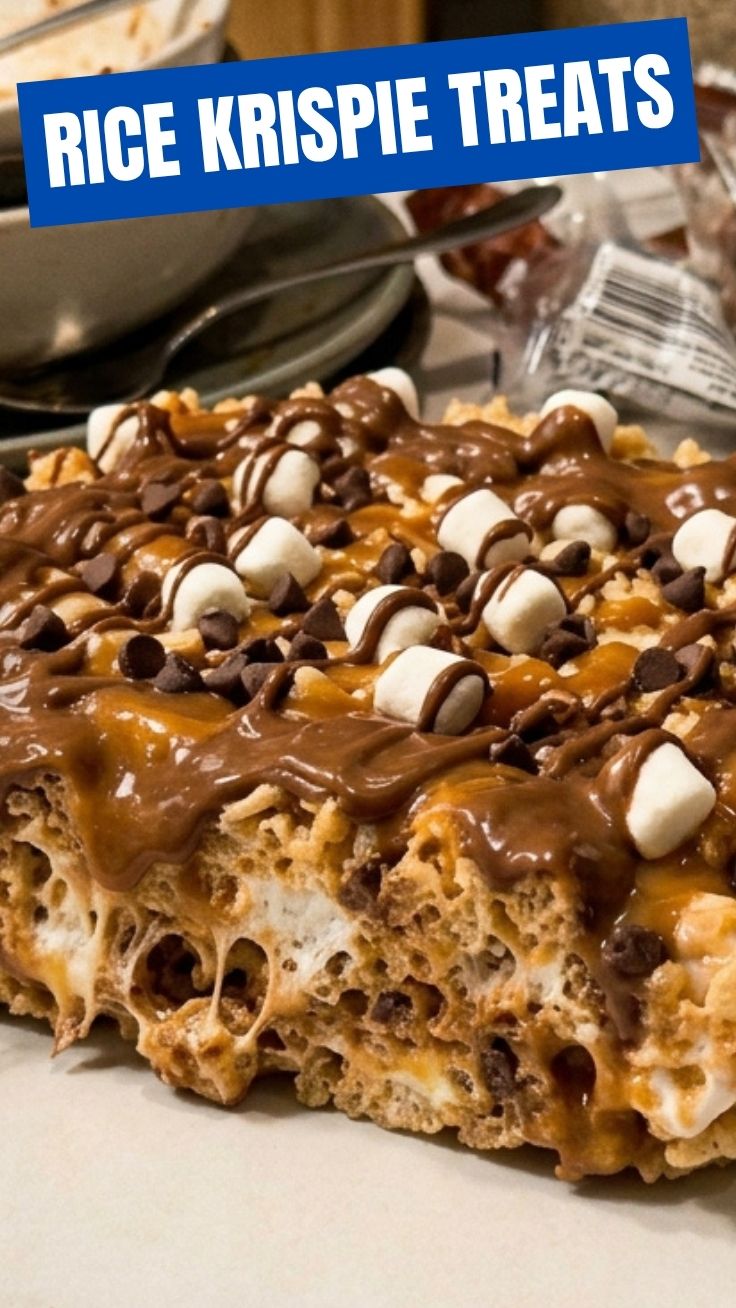
This recipe is incredibly quick, making it perfect for a last-minute dessert or a fun activity with kids.
- Prep Time: 5 minutes
- Cook Time: 5-7 minutes
- Resting Time: 30-60 minutes (for setting)
You can easily fit this into a busy schedule. The active cooking portion is minimal, allowing for ample time for your treats to cool and firm up.
Step-by-Step Instructions
1. Prepare Your Dish: Grease a 9×13 inch baking dish with cooking spray or butter, then line it with parchment paper, leaving an overhang on the sides for easy lifting. Lightly grease the parchment paper as well.
2. Melt the Butter: In a large non-stick pot, melt the unsalted butter over low heat. Low heat is crucial to prevent the butter from browning too quickly and imparting a nutty flavor (unless that’s what you’re going for!).
3. Add Marshmallows: Once the butter is fully melted, add the mini marshmallows to the pot. Continue stirring constantly over low heat until the marshmallows are completely melted and smooth. This typically takes about 3-5 minutes. Resist the urge to rush this step with higher heat, as it can result in tough treats.
4. Introduce Flavor (Optional): Remove the pot from the heat. Stir in the vanilla extract and a pinch of salt, if using.
5. Incorporate Cereal: Quickly add the 6 cups of rice krispie cereal to the melted marshmallow mixture. Using a greased rubber spatula or wooden spoon, gently and swiftly fold the cereal into the marshmallow mixture until it’s evenly coated. Working quickly here is key before the mixture cools and hardens.
6. Press into Dish: Transfer the coated cereal mixture into your prepared baking dish. Lightly grease your hands or another piece of parchment paper and gently press the mixture evenly into the dish. Avoid compacting it too tightly, as this can lead to hard, dense Rice Krispie Treats. Just enough pressure to create an even layer is perfect.
7. Cool and Serve: Let the treats cool completely at room temperature for at least 30-60 minutes before slicing into squares and serving.
Nutritional Benefits & Advantages
While Rice Krispie Treats are undoubtedly a dessert, they offer a few minor advantages. The primary ingredient, rice krispie cereal, is often fortified with essential vitamins and minerals like iron and B vitamins. Being gluten-free (check cereal label to confirm), they can be a suitable treat for those with dietary restrictions. Moreover, they are relatively low in fat compared to many baked goods. The advantage of homemade preparation lies in controlling sugar levels and avoiding unnecessary additives often found in commercially produced treats.
Tips, Variations & Cooking Advice
- Brown Butter Bliss: For a gourmet twist, brown your butter before adding marshmallows. Melt butter until it turns amber and develops a nutty aroma for a deeper flavor.
- Chocolate Drizzle: Once cooled, melt some chocolate chips and drizzle artistically over the top.
- Sprinkle Party: Add festive sprinkles to the warm mixture or on top before setting.
- Flavor Extracts: Experiment with almond, peppermint, or even a touch of orange extract for different flavor profiles.
- Nut Butter Boost: Stir in a tablespoon or two of your favorite nut butter (peanut, almond) with the marshmallows for added richness and a subtle nutty taste.
- Gluten-Free Version: Many rice cereals are naturally gluten-free, but always double-check the label for certified gluten-free products if this is a strict requirement.
- Dairy-Free Option: Use a plant-based butter alternative and ensure your marshmallows are gelatin-free (some contain animal gelatin).
Common Mistakes to Avoid
- Overcooking Marshmallows: Melting marshmallows over high heat or for too long will result in hard, rock-like treats once cooled. Keep the heat low and stir constantly.
- Over-Compacting: Pressing the mixture too firmly into the pan will make your treats dense and tough. A light, even press is all that’s needed.
- Stale Cereal: Using old or stale rice krispie cereal will lead to a lack of crispiness. Always use fresh cereal.
- Skipping Grease: Not greasing your spatula or hands will lead to a sticky mess. Don’t skip this step!
Storage & Meal Prep Tips
Store your homemade Rice Krispie Treats in an airtight container at room temperature. They will generally stay fresh and optimally chewy for 2-3 days. Avoid refrigerating them, as this can make them hard and diminish their delightful texture. They are best enjoyed within the first day or two. Freezing is not recommended as it changes their texture significantly.
Conclusion
Crafting your own batch of Rice Krispie Treats is a simple pleasure that yields impressive results. With just a few basic ingredients like butter, marshmallows, and rice krispie cereal, you can create a nostalgic dessert that’s far superior to any store-bought equivalent. This recipe is not just about making a treat; it’s about creating memories and enjoying the simple act of baking. Give it a try, experiment with our variations, and don’t forget to share your delicious creations with us!
FAQs
Q1: Why are my Rice Krispie Treats hard?
A1: This is usually due to overheating the marshmallows or over-compacting the mixture in the pan. Ensure you melt the marshmallows over low heat and only gently press the mixture into the dish.
Q2: Can I use flavored marshmallows?
A2: Absolutely! Flavored marshmallows can add a fun twist. Just be mindful of the added sweetness and adjust any extra sugar or flavorings accordingly.
Q3: How can I make them extra gooey?
A3: For extra gooeyness, reduce the amount of cereal slightly (e.g., 5.5 cups instead of 6) or increase the marshmallow quantity by about 1-2 ounces.
Q4: How long do they last?
A4: Stored in an airtight container at room temperature, they are best enjoyed within 2-3 days for optimal freshness and texture.